
Configure the web scanner display
On this page
Web scanner: shared event settings for organizers and editors.
For organizers and editors: choose the information check-in staff see in the web scanner. Changes apply to all scanners for the selected event.
Open settings for the correct event
As a signed-in event editor or reservation editor, open Menu → Scanner display settings. If the item is unavailable, ask an organizer with the required permission. A scanning access code alone does not authorize changes to these settings.Open scanner display settings
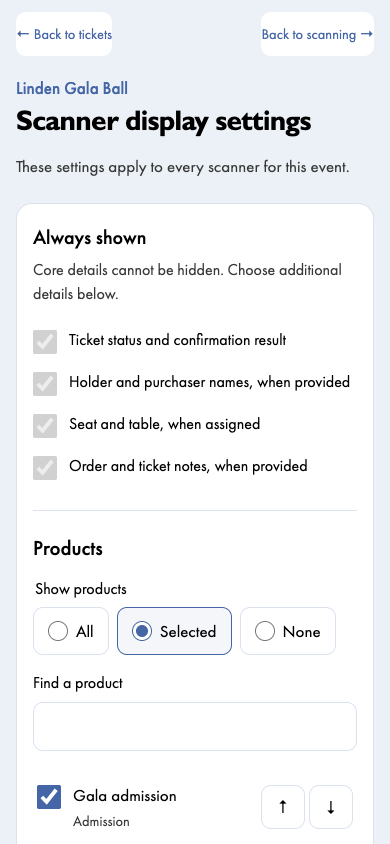
Core details and products
Always shown includes ticket status and confirmation result, holder and purchaser names, assigned seat and table, and completed order and ticket notes. These core details cannot be hidden and appear when provided.
For products, choose All, Selected or None. All includes newly added products. With Selected, check the products staff need, use Find a product and adjust their order with the arrows. This changes the check-in display, not the order contents.
Additional form answers
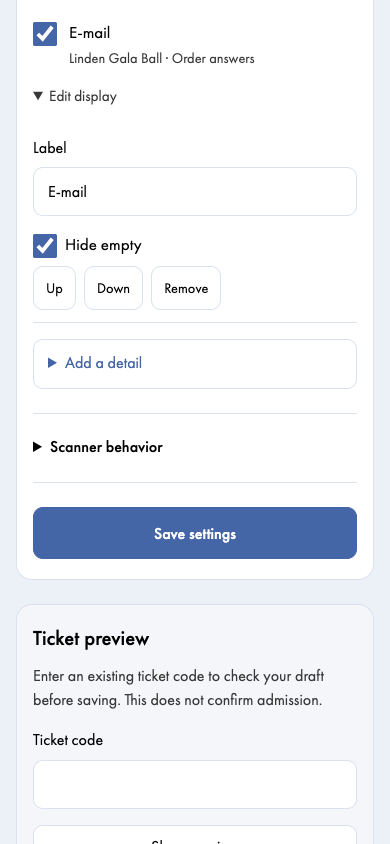
Use Add a detail to select an existing form field. The picker distinguishes Order answers and Ticket answers from the event's forms. A purchaser's email belongs to the order and may not belong to each ticket holder. If a field is missing, check the form fields and whether they belong to the order or ticket.
Use the checkbox beside an added field to choose whether to show it. Open Edit display to change its Label, enable Hide empty, move it Up or Down, or Remove it from the scanner display. Removing it here does not delete the answer from the order.
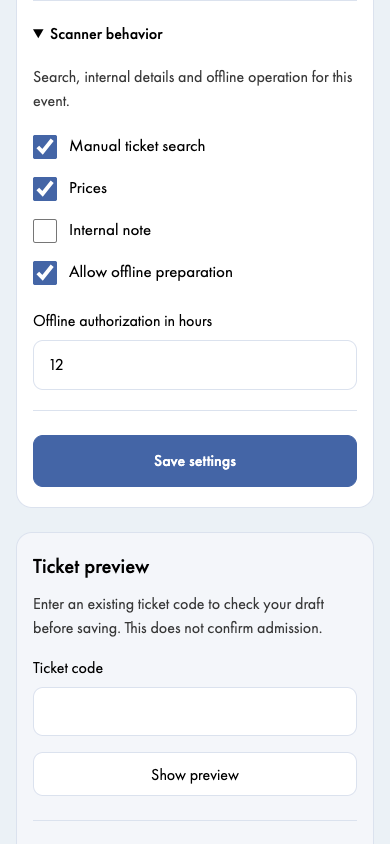
Advanced scanner behavior
Expand Scanner behavior to control manual ticket search, participant search, prices and the internal note. Enable the details and tools staff need for this event. Completed ordinary notes remain part of the core display; the internal note is a separate option.
Allow offline preparation and Offline authorization in hours control preparation for work without internet access. The maximum is 12 hours. When allowed, events with at most 1,000 tickets in the offline data prepare automatically when the scanner opens online. Prepare larger events manually from the scanner menu. Always verify completion while connected; enabling the option alone does not guarantee device readiness.
Preview, save and reopen access
Enter an existing ticket symbol in Ticket preview and select Show preview. The preview uses your draft before saving and does not confirm admission. The example shows a previously used ticket. Find the test ticket symbol in your event's Tickets section.Open tickets in the app
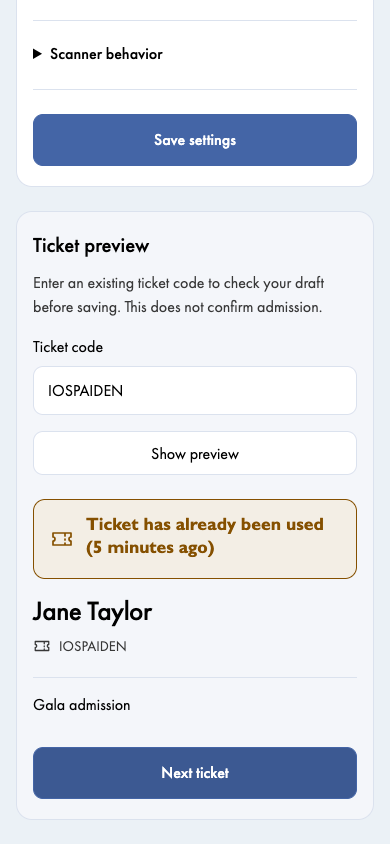
Select Save settings and wait for the saved message. Reopen the event in the scanner to obtain fresh authorization, and coordinate this with other staff, especially after changing search or offline access. If another editor changed the settings meanwhile, reload the current version and compare it with your draft.
After saving, follow check-in preparation on the staff device.